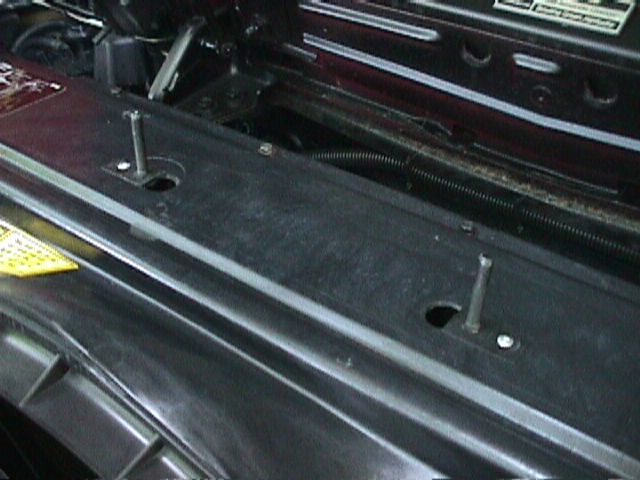
Recently I had to remove the air cleaner plenum for the first time. Unfortunately, when I tried to spin the plastic thumbscrews holding the plenum, they simply spun and did not release the plenum.

Having never removed the plenum before I didn't know how it was attached to the radiator shroud below it. I consulted the service manual and some pictures in various Corvette parts catalogs and realized that the plenum studs were inserted into a key-hole in the radiator shroud and the studs were held in the key-hole by a spring steel tang.
I inserted a putty knife between the radiator shroud and the plenum and was able to hold the tang in place while I removed the thumb screws.
Once I had the plenum removed I looked to see if the plenum studs were broken but they appeared to be in good shape. It appeared that the design was simply a bad one and the spring steel tang just didn't exert enough downward force the keep the plenum studs from spinning.
I started looking for a way to fix this problem and finally decided to drill a 1/8" hole through the tang and the radiator shroud. I could then pop-rivet the tang to the shroud and the stud would then be held firmly in place.
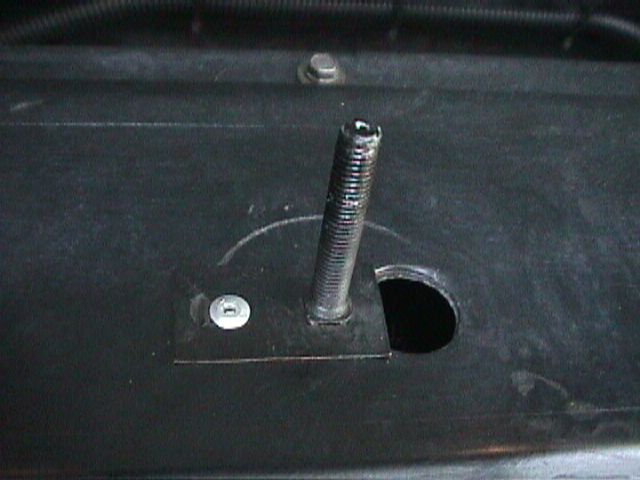
You can see in the picture above the scratch mark left on the radiator shroud when the stud was spinning free. Notice that I turned the tang 180° from its normal position over the large end of the key-hole in order to rivet it to the radiator shroud.
The pop-rivet fix is simple, looks like something the factory might have done and doesn't interfere in any way with the existing components.
Note: It appears that if you drill in the area described above you will NOT be drilling near the radiator. But you should exercise caution when modifying your car as it may be different than mine.